Friday, 22 October 2010
Conclusion
I am pleased with how my knowledge of 3D Max had progressed throughout this module, considering this time last year I was only being introduced to the software I feel I have definitely made good progress. I have definitely learnt a lot from the tutorials and this has helped to boost my confidence when using 3D Max software. My model is not finished to the standard I would like it to be and I have not entirely completed it. Having had more time I feel I could finish it but my lack of knowledge has made this difficult for me.
UVW Mapping Part1
Wednesday, 20 October 2010
Primitive Extension Part 2
The next stage I had to add more polygons too align them with the back of my head and the neck. This took me a long time to do. I had to add more polygons because some of my vertices's did not line up with my topology. I created this by cuting through the original polygons to extend the topology. This was very time consuming and took me ages to tweak. I also made it worse for myself because I concentrated mainly in the left view port and when I changed views the polygons were all over the place! So that will teach me!
Tuesday, 19 October 2010
Primitive Extension
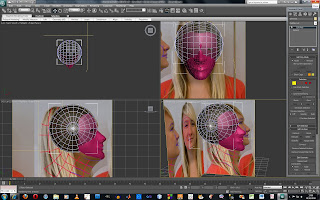
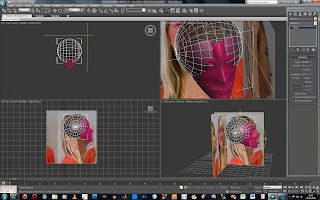
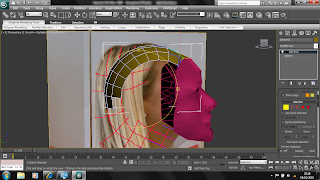
Nose & Mouth
I have completed my nostrils by creating a quadrant and using the extrude polygon tool I assigned it a negative value and manipulated it. I played around with the nostrils for quite some time as I wanted them to appear quite realistic.
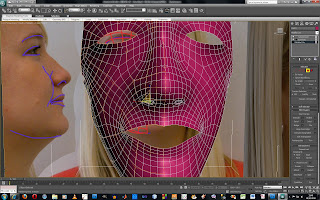
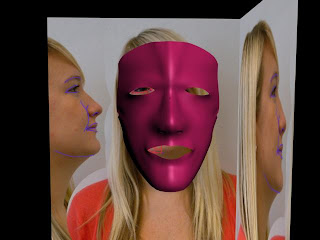
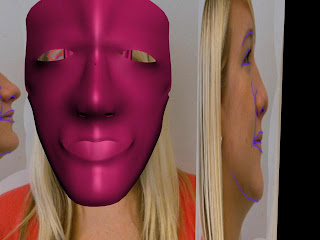


Then next thing to do was create the mouth using the same method as the nostrils. I had a go at this, I dont think it looks great but will move on and come back to it a bit later on.

Symmetry
The next stage was to copy one side of the face onto the other. There were a few ways to do this but I decided to go with the one that was the most exporter friendly. In the modifer list I applied a symmetry modifer and on the "+" sign on the symmetry I applied a mirror. I positioned it so the two faces joined up and I then had a solid mesh.
I had to make sure that all the edges looked naturally curved so they flowed from one side to the other. I then wanted to make sure the image was smooth so I used a turbo smooth from the modifier pannel.
Monday, 18 October 2010
Line to Surface: Take 2
I decided to take a look at my topology again to see where I was going wrong and why I was having problems dragging the vertices out. The first thing I noticed was some of my vertices had not been weld together which was causing me problems as the image showed bare skin when I moved them out. So the first thing to do was to make sure all the edges had been weld together.
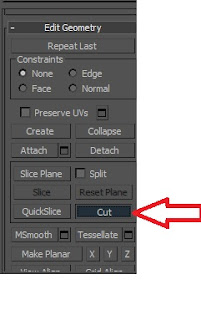
I then used the 'Cut' tool in 'Edit Geometry' as I found that I had created a few pentagons so these needed to be changed. By high lighting over each edge and draging it out into each corner vertice I was able to cut the pentagons into four sided shapes. I found this tool very useful and would definately use it again as it made the process a lot easier than having to delete the entire shape and start again.
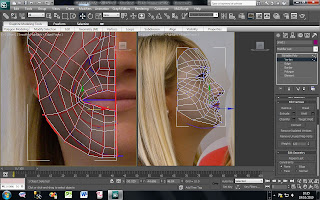
After I had sorted out my topology I then decided to try again moving the vertices over lining them up looking at the front view of my face. Once I had grasped the concept of how to do it, it was a case of following the lines down my face and selecting the 'X' axis. They starting point was my eye and I worked my way down my face pulling them across. Once key features were defined I was able to visulise where ther vertices needed to be pulled to, thus making the process a lot easier.
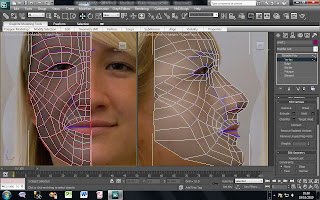
I then used the 'Cut' tool in 'Edit Geometry' as I found that I had created a few pentagons so these needed to be changed. By high lighting over each edge and draging it out into each corner vertice I was able to cut the pentagons into four sided shapes. I found this tool very useful and would definately use it again as it made the process a lot easier than having to delete the entire shape and start again.

After I had sorted out my topology I then decided to try again moving the vertices over lining them up looking at the front view of my face. Once I had grasped the concept of how to do it, it was a case of following the lines down my face and selecting the 'X' axis. They starting point was my eye and I worked my way down my face pulling them across. Once key features were defined I was able to visulise where ther vertices needed to be pulled to, thus making the process a lot easier.


Wednesday, 13 October 2010
Line to Surface
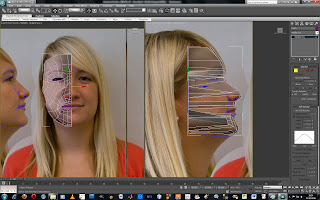
I have weld all my vertices together so I now have a complete mesh.
The stage was dragging the vertices across the face to line them up with the front image. I have started the process but am finding this quite tricky as I seem to have vertices coming from everywhere and I am finding it hard to visualise where they need to go in order for them to line up.

Thursday, 7 October 2010
Changed Topology
I went back into Photoshop and created a new layer to draw my topology again. I tried to mirror the tutorial image as much as possible to my head as this would help me in the later stages. After this I reopened the image in 3D Max and picked up where I left off.
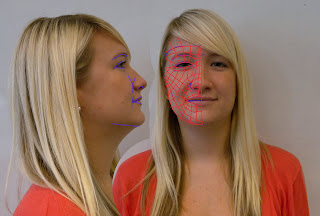
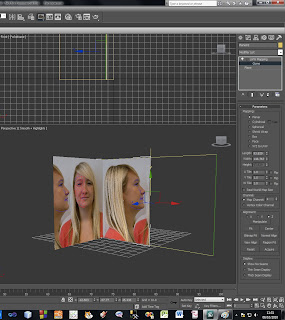
I am much more happier with this topology, there are less lines and they are thinner so hopefully I wont get as confused. I just wish I would have taken more time in the first week to get this part done rather than waste a week!


Wednesday, 6 October 2010
Reference Setup
I was quite pleased with how my head was progressing, however I hit a problem.
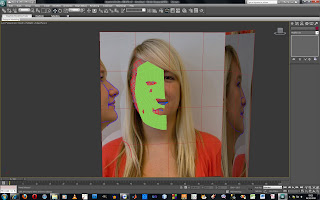
The topology lined I had created for the mesh were very confusing and this was causing great difficulty for me. I decided to go back to Photoshop and redraw them to help make it easier for me to follow in the later stages.

Back to the start I go!
Wednesday, 29 September 2010
Topology Lines
The second video looked at topology of the face. By creating a new layer I had to draw over my wrinkles and protrusions of my face isolating all the key areas. For example around my eyes, eyebrow, forehead, mouth and nose. This was to highlight the key areas of my face.
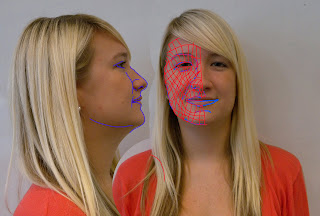
I then created another layer to trace over some of the original lines I had already drawn and created quads which would allow me to smooth the face when I sub divide it. This would reduce pinching in the surface which is very difficult to get rid off and would also give more flexibility to the face.

I found this quite difficult because sometimes with out realising I found I had created triangles in my face so had to erase them and draw the lines again so they equaled quads.
I then opened 3D Max and followed the tutorial. I found this tutorial quite straight foward and easy to follow it was basically setting up the image in 3D Max so it was in the right views for later tutorials.
I then had to draw the topology by drawing each one of the quads to convert them into a mesh which would fit to my profile. I created lines and matched them up to close the splines. I did however find that I had missed some of the quads out when I created the mesh, so needed to go back and change this.
Week 1
To begin I had my photo taken against white back ground which I would use to model my own head in 3D Max.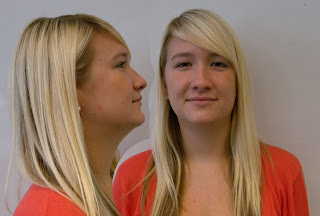

After this I used my photo to follow the first tutorials. The first tutorial was in Adobe Photoshop, which I found pretty straight foward and easy to follow. I know I may struggle once the tutorials move to 3D Max but I will deal with those problems when they arise!
I was quite lucky when lining up my face because I had to make sure my key features such as my eyes, nose and ears lined up.
Intro To Brief
My initial thought to this module........ wow this is going to be difficult!!
My previous experience with 3D Max has not been great and I still feel that I am not 100% comfortable with the software but I have had a look at the tutorials and they seem to teach at a reasonable pace, one that I will be able to follow. I am however looking forward to the challenge set and I may surprise myself with my finished head in 3D.
Subscribe to:
Comments (Atom)


