Friday, 22 October 2010
Conclusion
I am pleased with how my knowledge of 3D Max had progressed throughout this module, considering this time last year I was only being introduced to the software I feel I have definitely made good progress. I have definitely learnt a lot from the tutorials and this has helped to boost my confidence when using 3D Max software. My model is not finished to the standard I would like it to be and I have not entirely completed it. Having had more time I feel I could finish it but my lack of knowledge has made this difficult for me.
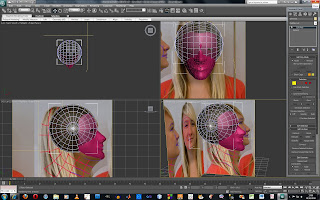
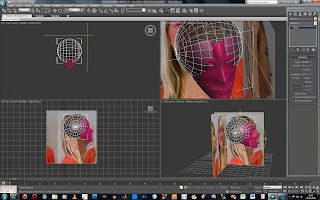
UVW Mapping Part1
I have started the UVW mapping I havent got very far due to time constraints and my lack of knowledge I am unable to finish my model. 


Wednesday, 20 October 2010
Primitive Extension Part 2
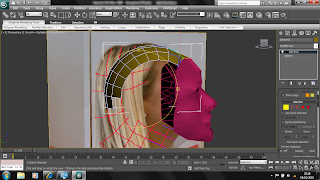
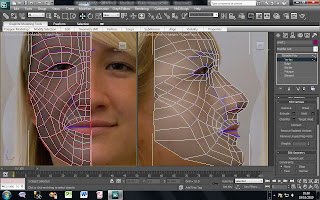
The next stage I had to add more polygons too align them with the back of my head and the neck. This took me a long time to do. I had to add more polygons because some of my vertices's did not line up with my topology. I created this by cuting through the original polygons to extend the topology. This was very time consuming and took me ages to tweak. I also made it worse for myself because I concentrated mainly in the left view port and when I changed views the polygons were all over the place! So that will teach me!


The final version of my head has lots of polygons and this had made it very difficult for me, as looking at the tutorial his example uses half of what I have.
I have also created a sphere and attached it to the head for an eyeball.


Tuesday, 19 October 2010
Primitive Extension
Nose & Mouth
I have completed my nostrils by creating a quadrant and using the extrude polygon tool I assigned it a negative value and manipulated it. I played around with the nostrils for quite some time as I wanted them to appear quite realistic.

Then next thing to do was create the mouth using the same method as the nostrils. I had a go at this, I dont think it looks great but will move on and come back to it a bit later on.
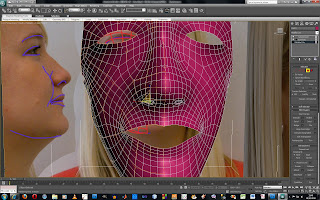
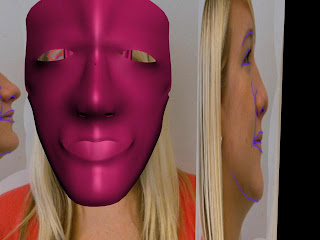
Symmetry
The next stage was to copy one side of the face onto the other. There were a few ways to do this but I decided to go with the one that was the most exporter friendly. In the modifer list I applied a symmetry modifer and on the "+" sign on the symmetry I applied a mirror. I positioned it so the two faces joined up and I then had a solid mesh.


I had to make sure that all the edges looked naturally curved so they flowed from one side to the other. I then wanted to make sure the image was smooth so I used a turbo smooth from the modifier pannel.


Monday, 18 October 2010
Line to Surface: Take 2
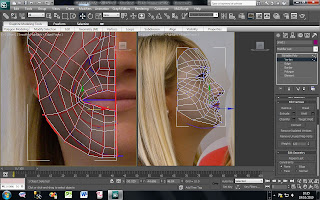
I decided to take a look at my topology again to see where I was going wrong and why I was having problems dragging the vertices out. The first thing I noticed was some of my vertices had not been weld together which was causing me problems as the image showed bare skin when I moved them out. So the first thing to do was to make sure all the edges had been weld together.
I then used the 'Cut' tool in 'Edit Geometry' as I found that I had created a few pentagons so these needed to be changed. By high lighting over each edge and draging it out into each corner vertice I was able to cut the pentagons into four sided shapes. I found this tool very useful and would definately use it again as it made the process a lot easier than having to delete the entire shape and start again.
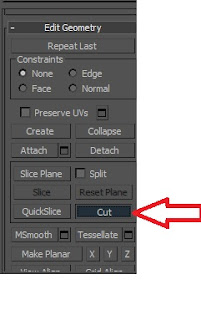
After I had sorted out my topology I then decided to try again moving the vertices over lining them up looking at the front view of my face. Once I had grasped the concept of how to do it, it was a case of following the lines down my face and selecting the 'X' axis. They starting point was my eye and I worked my way down my face pulling them across. Once key features were defined I was able to visulise where ther vertices needed to be pulled to, thus making the process a lot easier.


Subscribe to:
Comments (Atom)